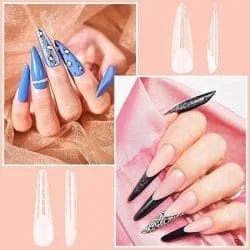
For a successful Popits application, the choice of gel is essential. Discover the most suitable options between acrygel, polygel, UV gels, their unique characteristics, and how to use them to achieve professional results.
Acrygel: The Ideal Versatile Solution for Popit Nail Extensions
The’Acrygel is an excellent choice for fidget toys thanks to its malleable consistency and his unlimited working hours. This hybrid gel combines the advantages of acrylic and UV gel, offering strong adhesion and a Natural finish. It fits the nail shape perfectly and stays in place in the popit mold.
To apply acrygel, use a special brush or a spatula. Place a small amount into the popit and shape it to your desired form. Acrygel does not cure in open air, allowing you to take your time for a perfect result.
Polygel: Flexible and Long-Lasting for Popit Nail Techniques
The Polygel is another ideal option for pop-its. Its Thick texture and its malleability making them a popular choice among professionals. Polygel offers Excellent outfit and a optimal flexibility, reducing the risk of breakage or chipping.
To work with polygel, use a dual-ended brush. Apply the product into the pop it, then smooth it out for a uniform surface. Polygel does not flow, making it easy to create precise and elegant shapes.
Thick UV Builder Gels: A Strong Alternative for Popit Nail Sculpting
Visit thick UV gels constitute an excellent alternative to the pop-it technique. Opt for formulas with high viscosity that do not flow from the mold. These gels offer great resistance and a Intense brilliance after polymerization.
Apply the UV gel into the popit using a fine brush. Ensure even distribution of the product to avoid air bubbles. Catalyze under a UV/LED lamp according to the manufacturer's recommendations for optimal curing.
| Type of gel | Advantages | Disadvantages |
|---|---|---|
| Acrygel | Versatile, unlimited working hours | It can be difficult for beginners to master |
| Polygel | Very malleable, durable | Requires a special brush |
| Thick UV gel | Intense shine, resistant | Limited working time before curing |
Application Techniques for Optimal Results
Mastering application technique is essential for getting the most out of your Pop-it gel. Discover pro tips for a perfect and long-lasting application.
Natural nail preparation
One careful preparation The nail is the key to a successful Popits application. Start by clean thoroughly natural nail and push back the cuticles. Lightly roughen the surface for optimal adhesion.
Then apply a acid-free primer to dehydrate the nail and improve gel adhesion. This step is crucial to prevent premature lifting of your popit extension.
Application of the gel in the pop it
Choose one adapted pop-it to the size and shape of your natural nail. Apply a adequate amount of gel in the hollow of the popit, making sure not to exceed half of the mold.
With the help of a special brush, shape the gel to the desired form. Make sure to create a well-defined apex to strengthen the nail structure.
| Type of gel | Recommended quantity | Working time |
|---|---|---|
| Acrygel | Little hazelnut | Unlimited |
| Polygel | Fine couch | 3-5 minutes |
| Thick UV gel | Average drop | 1-2 minutes |
Catalysis and finishing
Position the popit on the natural nail, pressing firmly to remove air bubbles. Make sure the gel perfectly fits the nail shape for optimal hold.
Catalyzed under a UV/LED lamp according to the manufacturer's recommendations. Once cured, gently remove the popit, starting from the edges. File and shape the extension to the desired shape.
Finish by applying a top coat shiny to seal and protect your work. Don't forget to catalyze one last time for a flawless and durable finish.